The rules of reality say the Bumble Bee shouldn't be able to fly...some rules were meant to be broken.

Showing posts with label green decorating. Show all posts

Tuesday, April 9, 2013

Basic Books


I feel sorry for books.


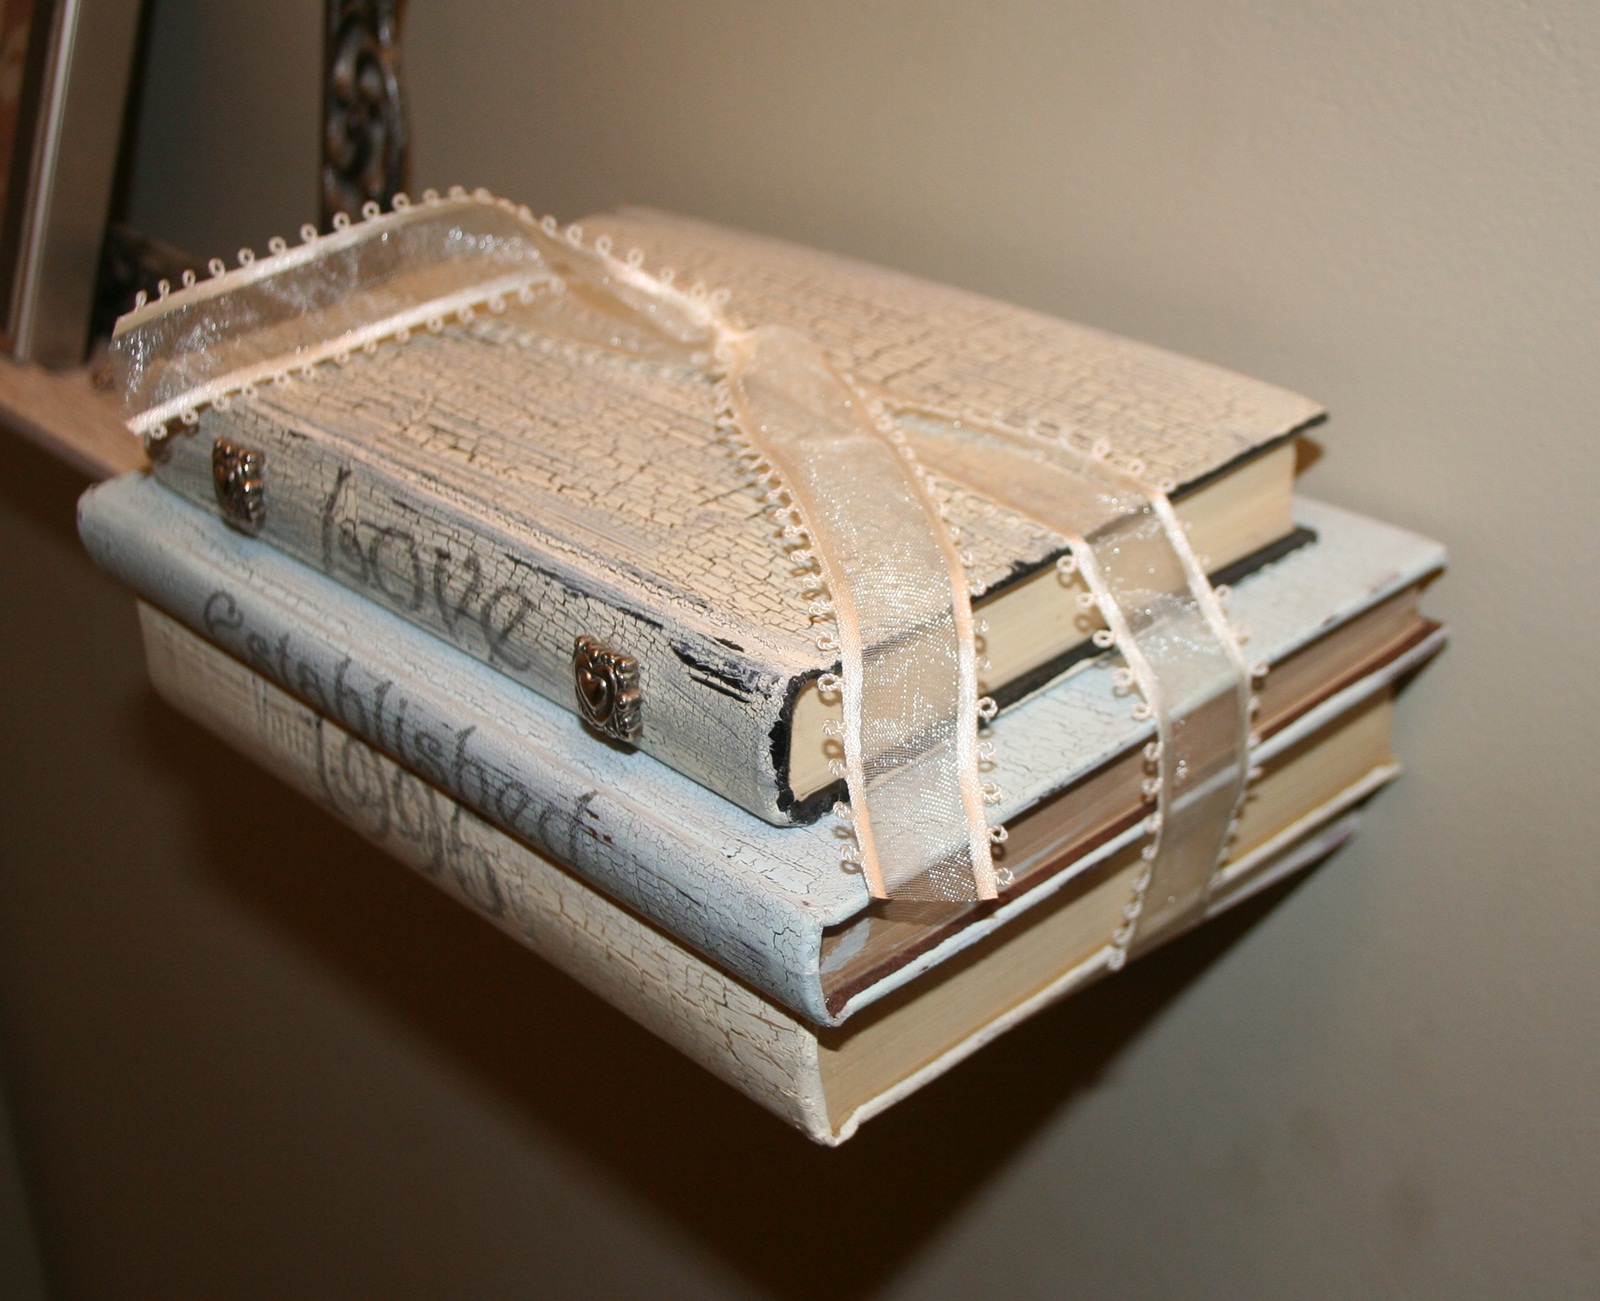
Not all books, just those already-read, can't-sell-at-a-yard-sale, obscure little books that end up at the thrift store collecting dust.  I keep waiting for my brain to kick in with all sorts of wonderful inventions.  Every once in awhile a new idea crops up, but alas, I feel there must be more creativity stuck inside my gray matter that just hasn’t surfaced yet.


Maybe some of my already created treasures will inspire someone else to save a few trees, and a few written words from ending up in the recycle bin.

Crackle finish memory book trio

Burlap covered book duo - Spray paint burlap using an old lace curtain as a stencil

You can use your printer to create a fabric accent on muslin.

Another pretty book.  I printed the burlap on my printer then stitched the fabric layers before gluing to the book.  Highlited with a rhinestone and a ribbon.


 If you are in the mood for a little more effort, see what you can create after you pull some books apart.
Hard cover text book repurposed into a journal for my sister.  (PS, we're dutch)


Sunday, November 11, 2012

A Little Girl's Dream

Nothing is useless.  Even if parts are missing...even if a substantial part is missing.  When you are willing to look past what others might see as limitations or defects the possibilities become wonderful.

I am sure that this piece when it was in it's full form was quite pricey, but after all is said and done, when half of it became worthless the other half became almost as much so.  For $12.50 we picked this fancy Armoire top up at the local Goodwill store.  Ponder, ponder, ponder.  It was beautiful, but what could be done with only half of an armoire.

Confession time.  My daughter and son-in-law actual came up with the idea and the 3 of us pulled it off.  A little sanding, a few balled feet, some paint and a miraculous fabric find at another Goodwill and voile'.  We turned this left-over, half baked idea into something beautiful.

What little girl would not want this in her room.  I wish I was 8 again.


Look beyond the defects and let the child in you see the perfection.

Tuesday, November 30, 2010

Continuing The Project

Here is an update on the "What To Do When You Don't Have The Energy To Do Anything" post from last week.  I've added a few things to my fabric wreath, but I'm simply not convinced that I'm done.

If you have any input please feel free to comment.

Sunday, November 28, 2010

Cute As A Button

I love my house.  It's old, it's tiny, it needs a lot of sprucing up, but I love my house.  Did I mention the fact that I love my house?

Our 1954 Ranch style home has a warm cottage feel.  At only 1300 square feet it's small.  When everyone still lived at home it was packed and felt packed.  The rooms are small and the bathrooms...don't even get me started.  I think my kids have the smallest bathroom on the planet. 

But I recently gave it a little pick me up and the charm has increased.

Yes, it was cheap.  I used recycled exterior faux shutters picked up at Stardust building supplies (there is a link below) for $4 a piece.  These originally black shutters were painted a horrendous olive green.  Two can's of extra coverage paint put them back to their original black color.  Ha!  Take that you ugly green people.

After a ridiculous attempt to drill a hole in the block wall with my regular drill, a trip to Home Depot was in order.  Let me just say this, the right tool makes the job so much easier.  With that big power driver I rented my son and I drilled out the remaining 23 holes in about 45 minutes.  Well worth the extra funds in my opinion.

The shutters were a piece of cake to hang.  I just tapped 6 plastic nail looking thingy's with little teeth in each shutter.  Perfect.  Next, I painted the window grids and surrounding sills in an antique white.  The shutter project took about 2 hours, including the trip to HD.  The painting touch up took the rest of the day.  It took an additional day to scrape all of the extra paint off of 41 window panes, but the ultimate result was achieved.  Charm, charm, charm, charm, charm.


Shutters...$16.  Paint...$22.  Tool rental...$40.  The charm that greets you went you come home...priceless. 

Oh, did I mention that I love my house....even more now?

P.S.  This is Arizona.  We do have tiny little pockets of quaint neighborhoods, and flood irrigation makes for some very affordable green grass.


Bryndal, your feet are all muddy!

Friday, November 26, 2010

Give Him Cookies And Milk And A Fat Man Will Let You Do Anything

I stuck a needle in Santa's butt.


 That's right ladies.  I stitched the old man's tush to a wreath and he didn't say a word.  Maybe he is just grateful that I saved his tiny little behind from a dirty yard sale box.  Maybe he had a sleigh accident and was paralyzed in the back side.  All I know is that he sat still and didn't squeel.

The shopping list for Mr. Clauses throne?   A white hangar from my closet.  Cotton fabric, lace and beads from the thrift store.  Ribbon from a craft grab bag at a yard sale.  And, of course, the man himself.  Kris was hiding in a box of Christmas leftovers at a yard sale last Saturday.  Shhhhh.  Don't tell him that he was actually a throw in on another deal.  I couldn't pass up that Korean war cluster bomb box...and...I asked them to throw in St. Nick.

The how-to for my man?  Cut lace into 5x5 squares and cotton fabric into 1 1/2x 9" strips.  I frayed the cotton to add a little softness to the piece.  Open an old hanger and run the hanger through each piece of lace about 4 times, folding the lace back and forth as you do.  Tie a piece of the cotton fabric on to the hanger between each piece of lace.  Pack that hangar full of lace and fabric, to the point where you can barely fit another piece in.  

Reconnect the hanger and fold the hook around into a loop with pliers.  If you're strong enough you can do it with your fingers but why risk breaking a nail.  
Wrap the wreath loosely in ribbon.  Sew the ribbon at various points to keep it from moving, if you wish.  Now for the fun part.  This is where I stuck Santa!  If you are going to make this wreath and have a LARGE center piece attach it first.  That way you won't cover up the cool little things you will attach later.
For the final touch I recommend sewing on beads, or trinkets, or pearls or whatever.  Make it your own.  Skip the hot glue gun.  I have found over the years that it doesn't stand up well in storage and you have to re-attach pieces every year.  Plus, I think that stitching things on this piece gives it a more Victorian feel.
Did I mention the milk and cookies??  Once Santa is stuck on the wreath....their aaalllllllllllll yours.
Merry Christmas and God bless.
Bryndal!  Share your toys.  Let the cat have the tennis ball for a while.


Wednesday, November 24, 2010

What to do when you don't have the energy to do anything.

I've been under the weather in various forms for the last few days.  Today I got hit with the chills and a little bit of a fever.  Yeah!  Just in time for Thanksgiving.

The thing I hate most about being sick is that I can't stand laying around doing nothing.  But when you are too weak to get up out of your chair the best thing to do is something in the chair.  So I grabbed an old hanger and a piece of decorator fabric I bought at a thrift store.  I cut the fabric into 9" x 1.5 inch strips (approximately).  Hey, I'm gone today.  There is no way I am going to measure them.

I sat in my chair and tied the strips around the hanger then used some pliers to wrap the hanger hook around itself behind the fabric.  This is what I got.


When I am feeling better, I'll look at decorating it.


Bryndal, stop licking your brother!

Tuesday, January 5, 2010

A Cost Summary Of My Entry Decor


I put together this entry collection with a lots of bargain shopping and a little bit of creativity.  Some pieces were new but very reasonably priced and others are re-purposed.  I'll start from the top down and go over where I purchased each item and what it cost. 

The mirror was purchased from Fry's Marketplace at 75% off.  Originally around $50 I was able to pick it up for $12.99.  This was not a scratch & dent or flawed in any way.  I was simply at the right place at the right time.

All of the books were purchased at Goodwill on half-off day.  I chose the top two because the covers were in very good condition and visually appealing.  The bottom book was painted with house paint and antiqued with a little bit of craft paint (see previous blog).


The red fabric mirror, the black iron decor and the ceramic bird were all purchased at Goodwill, again on half-off day, and all were in perfect condition.  The lamp was one I already owned but it was white with an ugly white plastic shade.  I spray painted the base of the lamp brown and antiqued it with a little bit of cream colored paint and picked up 1/4 yard of decorator fabric and beaded trim at Home Fabrics for $6.  The lamp shade was recovered using a little bit of hot glue.

The red table "runner" is simply one of my placemats.  The table itself was purchased at Fry's Marketplace for $25.  It was one of those put-it-together-yourself pieces, but the size was perfect.  The basket also joined us from Fry's.  It has a white cotton lining that is attached and I picked it up at 40% off - $7.  The picture is a drawing I did many years ago, of my son and his dog.  There are a few other framed drawings behind it.  I just switch them out and place a different one in front when I am in the mood.  Behind that, another Goodwill item.  Some scrap silk plant parts.

In total, I have calculated the approximate cost, not included the items I already had, to total around $62.  That's it.  After that it was just a matter of playing around with the arrangement until I liked the look. I did not have a plan for the decor or the display when I started.  The pieces caught my attention individually, and when I started putting everything together they kind of told me where they wanted to go. 

So now you are thinking I am crazy and I talk to inanimate objects.  YES, I do!  Try it sometime.  You may like what they have to say.


Monday, January 4, 2010

Quick Coaster Tray


I picked up a little wooden tray at the thrift store the other day.  It was bare unfinished wood but had a cute metal mesh on each side of the tray, and I thought I could do something with it.

Perhaps it would make a nice, non-traditional coaster for a couple of drinks,  or even a serving tray for a small fast-food meal.

I sprayed the whole tray with black spray paint and let it dry.  Then I taped off the metal mesh with painters tape and went over it again with a light coat of brown spray paint.  After drying, I attached a piece of scrap fabric so that the tray would not scratch my $12.50 coffee table (see previous blog) and then cut another piece of scrap fabric and frayed the edges.  I placed this fabric inside the tray but did not glue it.  This way if the fabric is spilled on or stained I can easily pull it out and place a new piece inside.  I can also change the fabric do coordinated with seasonal and holiday decorating.

It's a nice change from the traditional "coaster" and not bad for a buck.

Sunday, January 3, 2010

Beautiful Books

Keeping in line with our recycle theme I had a lot of fun turning used books into one of a kind decorations.  My sister-in-law calls it "repurposing".  With a few good hard cover books, some decorator fabric scraps, men's ties, and yard-sale jewelry I was able to throw together some nice pieces in very little tim.

The project is completed in such a way that the books are still ready for reading.  Enjoy full access to your library with a unique decorative flair.


I'll be writing an e-book with the step by step instructions for this one.  Check back soon to look for the link.


$12.50 Coffee Table


So your dog chewed up the furniture.  Big deal!

Talk about keeping stuff out of the landfill...I found this great coffee table at Goodwill.  I had obviously been chewed on a little by a dog, and three of the four bolts holding the table to the base were missing bolts.  The regular price of this table was $25 but it was half-off day so I picked it up for $12.50.

The heavy base was in great condition and other then some teeth marks the oak was a little scratched but in otherwise good condition as well.  With some help from my son and his truck (save more dough by borrowing a friend or family member) we brought it home and dropped it on the back patio.

I pulled out all four bolts and put the base upside down in the yard.  This allowed the wood top to extend out over the base and all the sides and corners were easily accessible for sanding.  With an electric sander I gave it a once over on the whole table and a little extra focus on sanding where the teeth marks were.  There were a few spots with glue or something else dried onto the table, but these sanded right off.  I don't think it was more the 15 minutes of sanding overall. 


I then used Glidden brand house paint in a Satin finish, in a basic black, painted the inside corners and dips in the wood with a brush then quickly rolled on one coat with a lint free paint roller.  I did a final roll from end-to-end without stopping to get rid of "roll over" thickness.  The next day I did the same with a second coat of paint.  (I waited an extra day due to the cooler temperature)  On day three I used a light sandpaper to distress the finish in a few places and then hit those spots with a very light coat of a matte finish spray.  I think the distressing helps to "cover-up" the dog's rustic treatment.

After a week or so, I will hit it with some spray pledge to give it some protection.  If its gets a little worn down the road I have left over paint and can easily touch it up again.

Not bad for less then $13.


Related Posts Plugin for WordPress, Blogger...